Adding Scenery
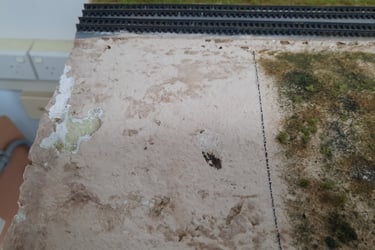
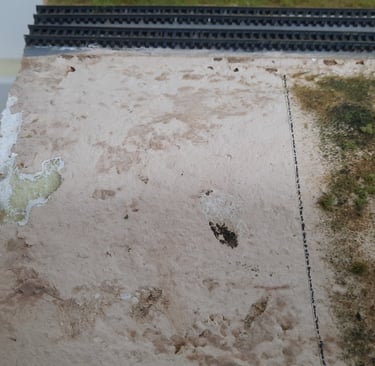
Section 1 – base scenery
This shows the base scenery. The ground has been formed using foam, and then painted with a brown paint to provide the base on which the rest of the scenery will be built.
The track is attached to the roadbed and then painted.
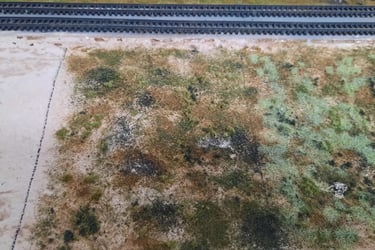
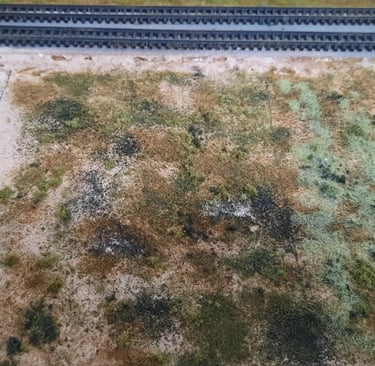
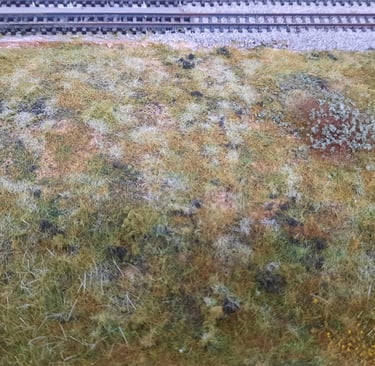
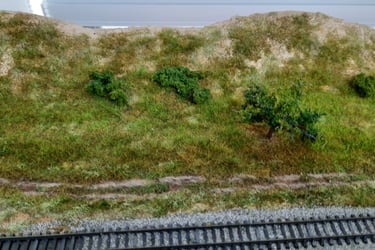
Section 2 – basic ground cover
White PVA glue is painted over the ground and fine turf (various Woodland Scenics fine turf blends) is loosely scattered over this. This is then left to dry.
A second layer of fine turf, and some coarse turf, is then applied and a diluted glue mix (50% Mod Podge matt medium and 50% water) is then applied over the whole surface to lock in all the turf. Again, this is then left to dry (give it at least 12 hours).
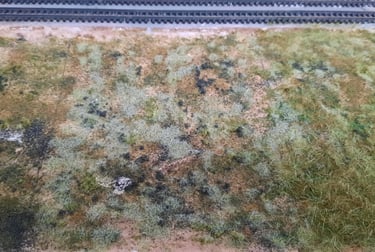
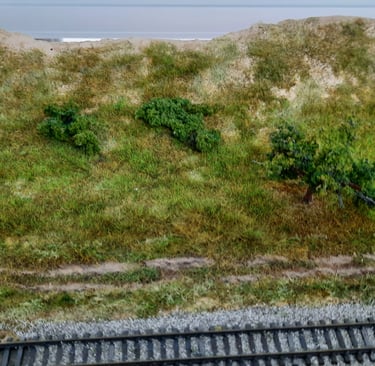
Section 3 – applying static grass
After vacuuming the surface to remove any loose turf, the diluted glue mix is dabbed onto the surface. A full coverage is not required for this stage – we want apply a mix of different coloured grasses, and not make it look like a well-manicured lawn. Then a light coloured 2mm static grass is applied, using a static grass applicator.
After applying the grass, use a vacuum to remove the excess grass .The vacuum will assist in getting the grass to stand upright. Allow to dry.
If there are going to be trees added to the scene, leave bare patches where the trees are going to be placed, as grass does not grow well under trees, so the static grass will not look right in the finished scene. The turf applied in Section 2 will provide the rough grass that does exist under the trees.
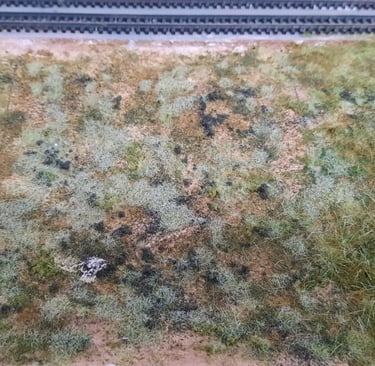
Section 4 – completing the static grass
More diluted glue mix is dabbed onto the surface, and a second application of static grass is then applied. This grass can be either 2mm or 4mm grass. Again, vacuum the grass to remove the surplus and allow to dry.
Then another layer of static grass is applied. This grass should be either 4mm or even 6/7mm.
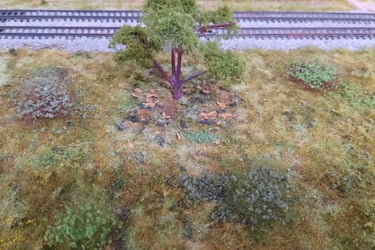
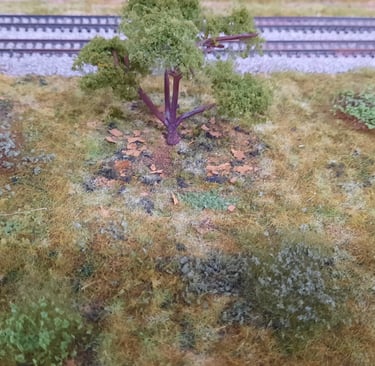
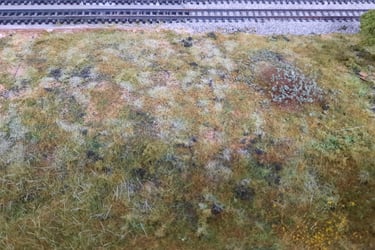
Section 5 – the details
The first step is to scatter a little coarse turf, and/or some Scenic Express Super Leaves into the static grass to represent flat leaf grasses. Dribble the diluted glue mix over this to lock the turf/leaves into place.
Then add bushes. For foreground bushes, use small balls of poly fibre, or felting wool, gluing these to the base with some Aquadhere, then spraying the bush with hair spray (extra hold, and preferably non scented) and sprinkling some Super Leaves or Noch leaves over to provide the foliage. Another spray of the hair spray will lock the leaves in.
For background bushes, clumps of Woodland Scenics Bushes, Underbrush and/or Clump Foliage can be simply glued using Aquadhere.
Finally, we can add the trees. Before gluing in the trees, scatter some fine dead leaves where the trees are to be places and glue in place with some diluted glue mix. Dead leaf mix can be made by putting some real dead leaves into a blender or coffee grinder, and reducing the leaves into a fine mix. Then glue in the trees.
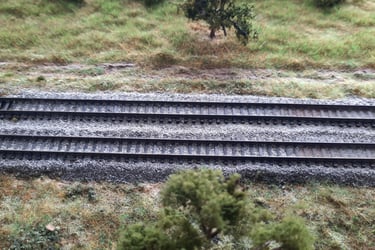
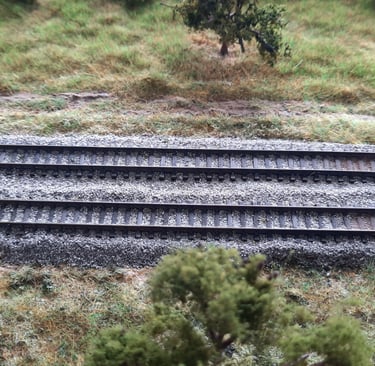
Section 6 – ballasting the track
Whilst not absolutely required, it is recommended to paint the sleepers. This can be done using some basic acrylic paints. Grey, Burnt Umber and White were used in this section.
Then apply the ballast. Apply the ballast dry and then lock into place using a mix of Aquadhere and water (50/50 mix) with a little dishwashing detergent mixed in to minimise surface tension. Allow to dry.
Some weathering powders have been lightly brushed down the middle of the track to represent oil dropped from the locos running on the track. This is the common appearance for diesel hauled trains. For steam era track, the grime is more on the side of the track rather than the middle.
Finally, any area between the grass and the ballast can be filled with either grass tufts or some fine dirt.
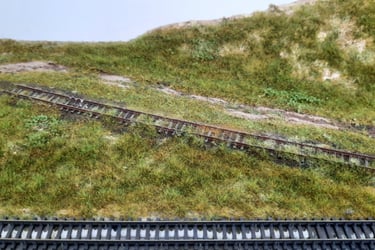
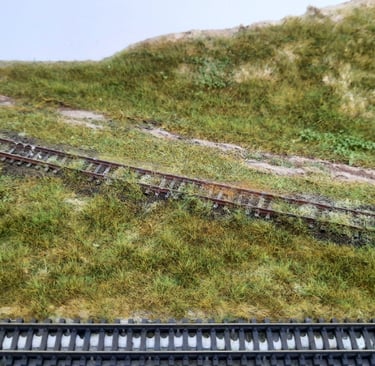
Section 7 – disused track
This section shows a piece of disused track (the rail painted a dark rust to show old rust) and the sleepers painted a light grey to show old sleepers). The ballast is different from the main line, but applied in a similar manner, although not much care is taken on the shoulders as the track represents abandoned track and thus not maintained. The ballast is then weathered using weathering powders and pigment powders.
The ballast is added before the application of the ground cover, as this allows for some overflow of the ground cover and definitely the static grass over the track to show it not only as disused but also overgrown. Tufts of long grass can be added to finish the scene.
Section 8 – support road
The support road has been made using WWS fine dry mud, and a couple of patches of WWS wet mud, through which a model truck has been pushed to form the ruts, and then some fine brown clay has been scattered over the mud. This has then been allowed to dry. Using a small brush, straight Mod Podge matt medium has been dabbed down the middle of the road and 2mm static grass has been applied. Tufts and some longer static grass has been applied on the side of the road.
The support road is made before any ground cover is applied. This will allow the grass to then be blended into the grass on the side of the road.
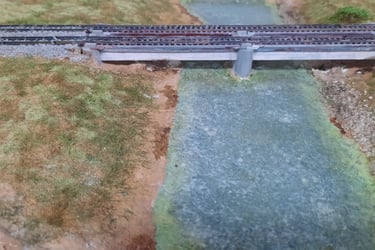
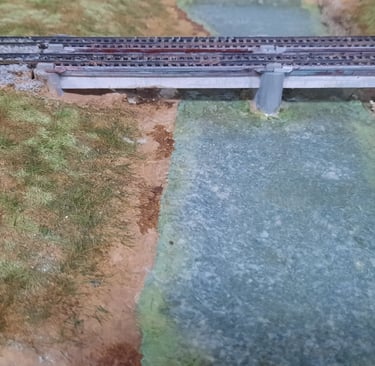
Section 9 – river
The river has been created using a process known as “faux glazing”. The river banks are painted with a wash of brown and green paints to represent shallow water, while the bulk of the river is painted with a single colour of deep green. A light blue paint is mixed with a transparent gloss medium and this is dabbed onto the river using a sponge. After drying, a slightly lighter blue paint/gloss medium is also dabbed onto the river using the sponge. Care has to be taken to ensure that the sponge is not dragged over the base as this will cause the effect to fail. Finally, a gloss medium paste, that will dry transparent is dabbed over the river. This creates the ripples seen on the surface, and makes the previous layers to appear to be under the surface of the river.
The bank on one side has had fine stones applied to form the bank, while to other side has had a combination of painted modelling clay and dabs of WWS “wet” and “dry” muds.
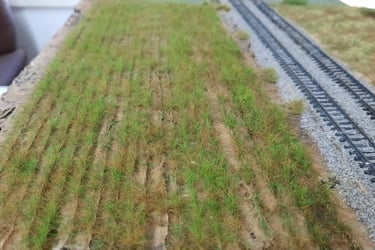
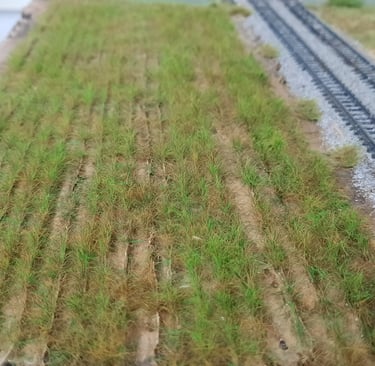
Section 10 – wheat field
This section shows part of a field which has been planted with wheat. The young plants are just starting to shoot.
The basic ground is as per Section 1, but has been covered with a modelling paste into which was pressed a piece of dowel to create the ploughed field. The ground has then been painted with some acrylic paint to resemble the colour of farmed ground.
Using a small brush, straight Mod Podge matt medium has been painted down each row, then 6mm WWS Spring static grass has been applied. After vacuuming the surplus grass, additional matt medium has been added to fill any gaps in the first application and more static grass added.
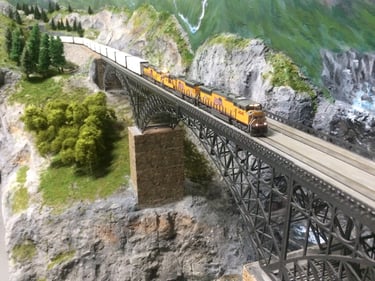
To assist members to see how easy it is to add scenery to their layouts, a couple of old modules had scenery added, with each step assigned to a section on the modules.
The modules are now on display at our clubrooms, allowing members and visitors to view the steps and see how easy it is to create effective scenery.
© 2025 Sydney N Scale Model Railway Club Inc.
Address
75 Chapel St
Rockdale, NSW, 2216
Contacts
info@sydneynscalemrc.com